
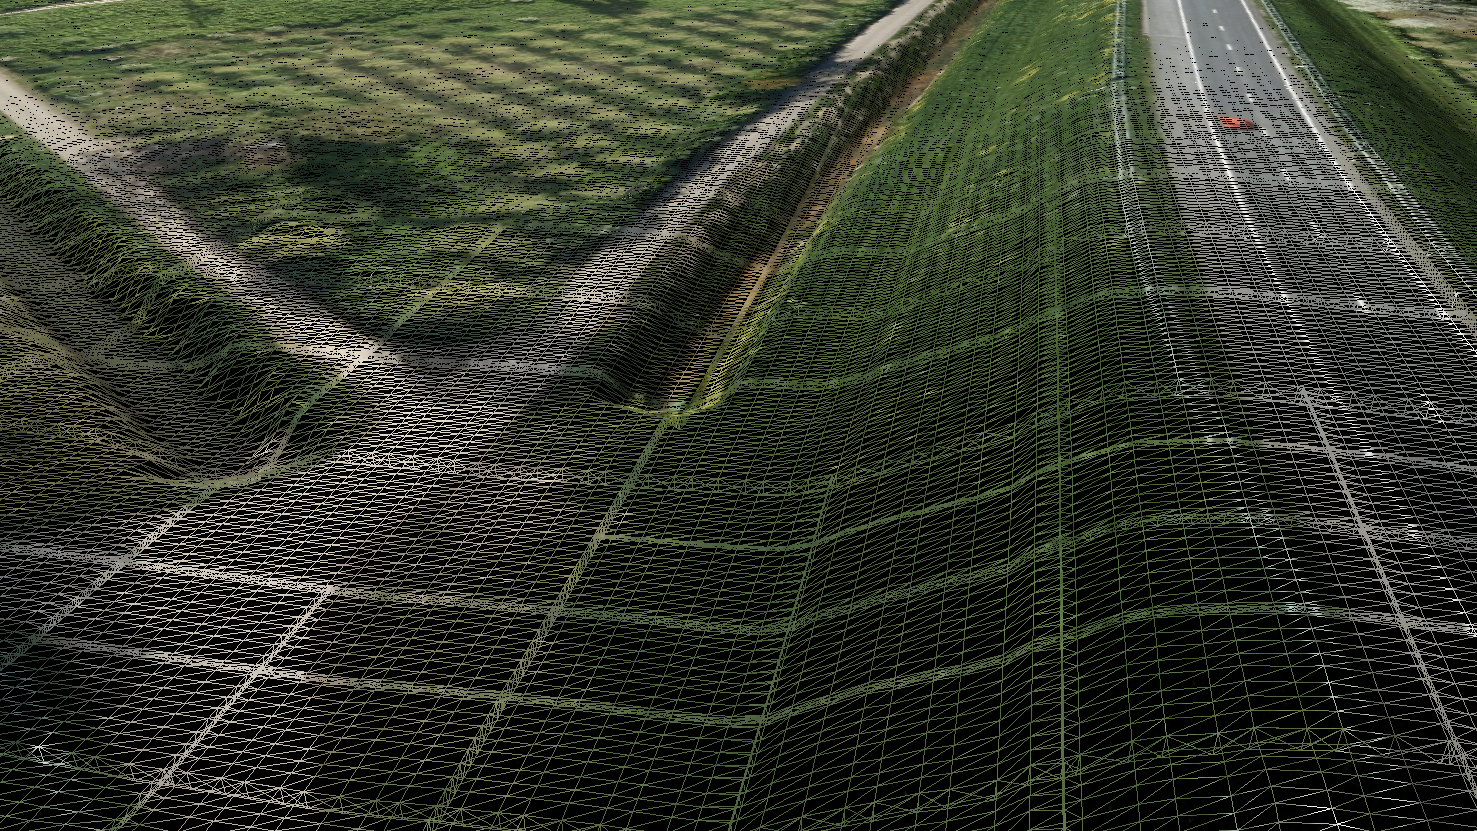
At the start of 2024, our team at Sogelink Research embarked on an exciting project: developing an open-source service called CTOD which stands for Cesium Terrain On Demand. This service generates terrain tiles on demand in the quantized-mesh format from Cloud Optimized GeoTIFFs (COG). These tiles are perfect for displaying a detailed terrain in the open-source Cesium viewer, it even works in with the Cesium plugins for Unity and Unreal.
Why is on-demand tile generation such a game-changer? Well, instead of cluttering up storage with millions of pre-generated tiles (most of which might never see the light of day), we can store COG files in the cloud, like on an S3 storage, and generate tiles only when needed. It's like only baking cookies when someone actually wants to eat them—so much less waste! Plus, CTOD is highly configurable, allowing you to decide how detailed you want your tiles to be. It also smooths out those pesky edge issues with normals that other tools often struggle with.
Here in the Netherlands, we have access to comprehensive 0.5-meter DTM and DSM datasets, also known as AHN4 (Actueel Hoogtebestand Nederland version 4, 2020-2022). The DTM (Digital Terrain Model) dataset is perfect for creating detailed terrain tiles.
In this post, we'll walk through the steps to prepare a nationwide dataset from AHN4 for use with CTOD. Let's dive in!
What Do We Need to Do?
- Create Cloud Optimized GeoTIFF files from all the downloaded AHN4 DTM GeoTIFFs.
- Create a .vrt (Virtual Raster Table) that includes all these COGs.
- Upload the COGs online and request tiles through CTOD.
Wow, sounds like we're almost done! Well... not quite. There's still a bit of work to do, but don't worry—it's not as daunting as it sounds!
Optimizing COGs
If you're working with a small dataset, you might get away without optimizing your Cloud Optimized GeoTIFFs (COGs). But when you're dealing with larger datasets, optimization can significantly boost performance.
Projection
To ensure that CTOD returns tiles correctly for viewing in Cesium, the data needs to be in EPSG:4326 projection. While CTOD can handle COGs in any projection on the fly (thanks to the magic of GDAL working behind the scenes), this can be a bottleneck, especially with a large dataset like the entirety of the Netherlands. So, to keep things smooth and speedy, it's best to reproject our GeoTIFF files to EPSG:4326 before creating the COGs.
Here's how you can do that:
gdalwarp -s_srs 'EPSG:28992' -t_srs 'EPSG:4326' input.tif output.tif
This command warps your GeoTIFF from the original EPSG:28992 projection to the required EPSG:4326 projection. Easy, right? Later on we can see that we're not dealing with 28992 and 4326....
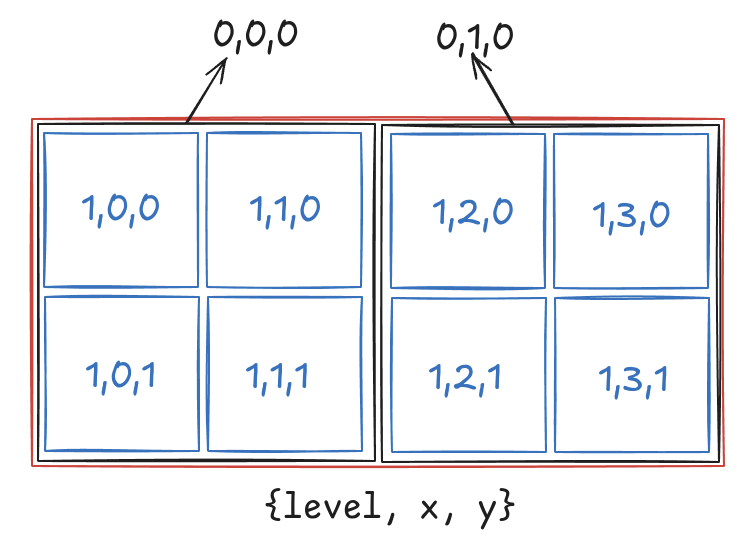
Tiling Schema
Cesium viewers request tiles using the WorldCRS84Quad tiling schema. When a tile request comes into CTOD, it fetches the relevant part of a COG using an HTTP range request. By creating our COGs with the WorldCRS84Quad tiling schema in mind, we can boost performance. This setup divides the image into tiles, each representing a small, fixed-size block of the raster data, perfectly matching the tiling schema used for requesting terrain tiles. In the script at the end of this post an example can be found how to do this.
Overviews
Overviews are essentially zoomed-out, lower-resolution versions of the original image, a process known as downsampling. By increasing the size of the grid cells, you make the image smaller and less detailed. GeoTIFF files often contain multiple overviews at different zoom levels. Without these overviews, a tile request might end up pulling a massive amount of data from the COG, which then has to be downsampled to fit into a 256x256 tile.
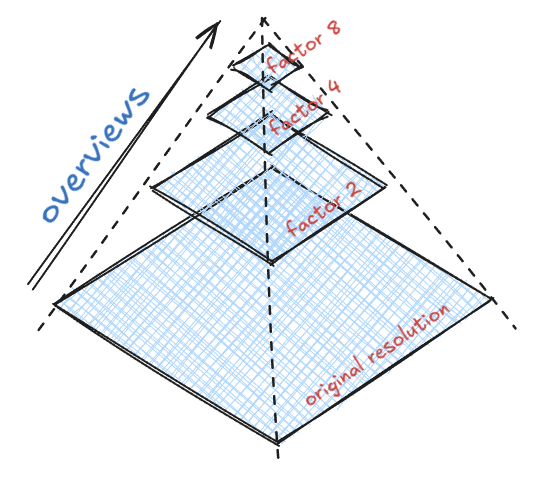
For our dataset, having 10 overviews works well, as the lowest overview level fits neatly within a single 256x256 tile. You can check the sizes of images at different overview levels using the gdalinfo tool.
gdalinfo -json M_30FN2_cog.tif
-------------------
 "overviews":[
	{
	  "size":[
		7680,
		5632
	  ]
	},
	{
	  "size":[
		3840,
		2816
	  ]
	},
	{
	  "size":[
		1920,
		1408
	  ]
	},
	.....
Web Optimization
To squeeze out a bit more performance, we can align the dataset precisely with the tiling scheme. This can be achieved by using the --aligned-levels flag with rio-cogeo when creating the COG. Aligned levels refer to the number of overview levels where the GeoTIFF tiles perfectly match the tiles defined in the tiling scheme.
However, there's a catch: setting too many aligned levels can introduce a significant "nodata" border around the dataset. This is especially problematic when using multiple COGs through a .vrt file. If there's too much overlap, CTOD/GDAL will need to fetch multiple tiles from all overlapping files and merge them, which can slow things down.
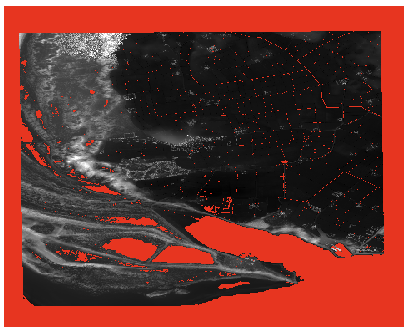
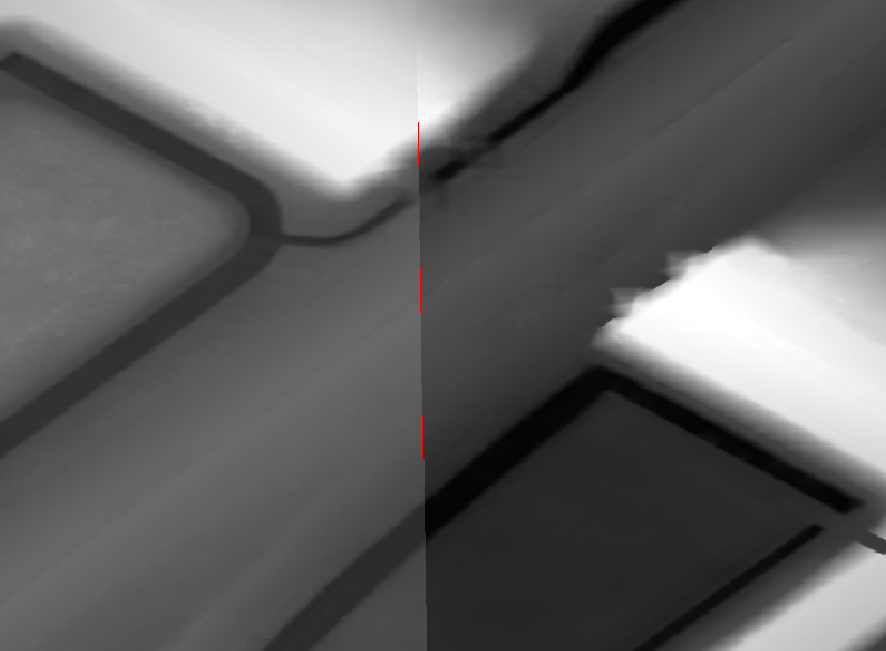
Here's an example of how much nodata (highlighted in red) can be added when setting aligned levels to 8.
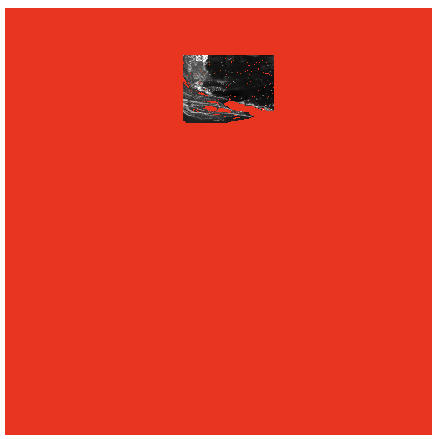
With aligned levels 2 we have a middle ground between aligning and added nodata around the data
Challenges
Of course, no project is without its hiccups.
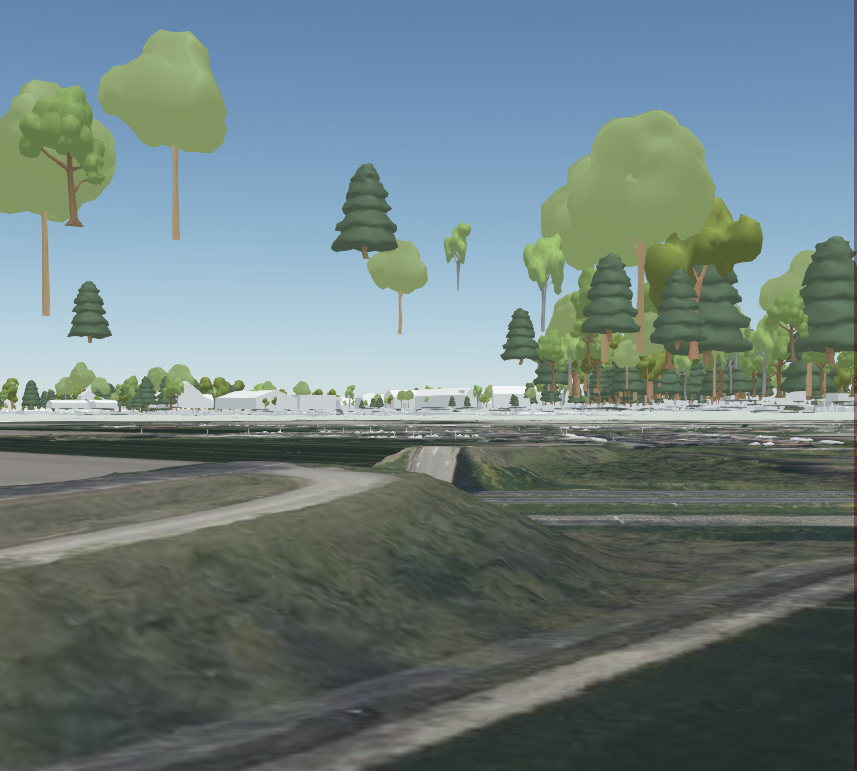
Incorrect Heights
After creating some test COGs and requesting the terrain through CTOD, we noticed something odd: floating houses and trees! It looked like a scene straight out of a surreal sci-fi movie. Clearly, something was off with the height data...
I can almost hear you thinking: "Ah, the classic geoid vs. ellipsoid dilemma!" Our data was originally in EPSG:7415 (Amersfoort / RD New + NAP height) but needed to be transformed to EPSG:4326+4979 for proper ellipsoid-based heights. Fortunately, our colleague Bert has written a great blog post on this very topic, check it out!
To correct the height, we needed to set the source and target spatial reference systems (SRS) correctly when using gdalwarp. Here's the magic command:
gdalwarp -q -multi -r bilinear -s_srs EPSG:7415 -t_srs EPSG:4326+4979 in.tif out.tif
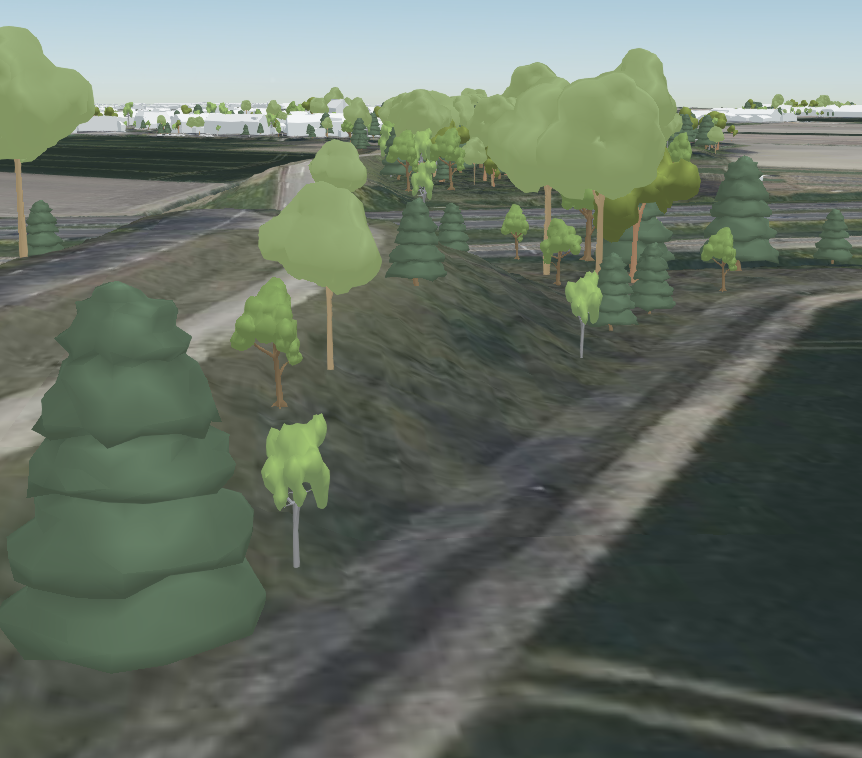
With this change, everything settled nicely back to earth, and the heights now look correct!
Nodata Values Not Looking Great
Our GeoTIFFs came with a lot of nodata values, especially around water bodies (and as you might expect, we have plenty of those in The Netherlands). This resulted in some less-than-ideal visuals, with noticeable gaps and peaks.
The issue stems from CTOD automatically treating nodata values as height 0 to be able to process the data, which can lead to those odd-looking artifacts. Clearly, this isn't the picturesque scenery we were aiming for!

To tackle the nodata issues, we can use gdal_fillnodata to fill in those empty areas. Since these nodata regions can be quite large, we use a high value for the -md (maximum distance) flag—something like 8000—to ensure a smooth fill. The -md parameter sets the maximum distance in pixels that the algorithm will search for neighboring values to interpolate.
While there might be more refined solutions out there, this brute-force approach has proven to work quite well for us. Sometimes, when in doubt, it’s best to go big and bold!
Jagged Edges After Warping
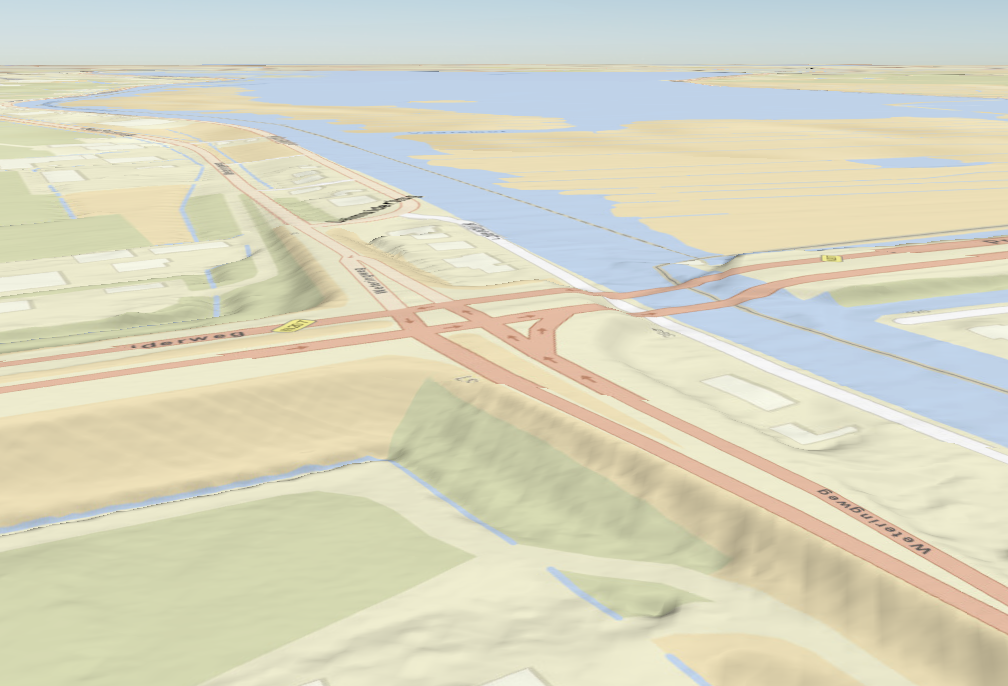
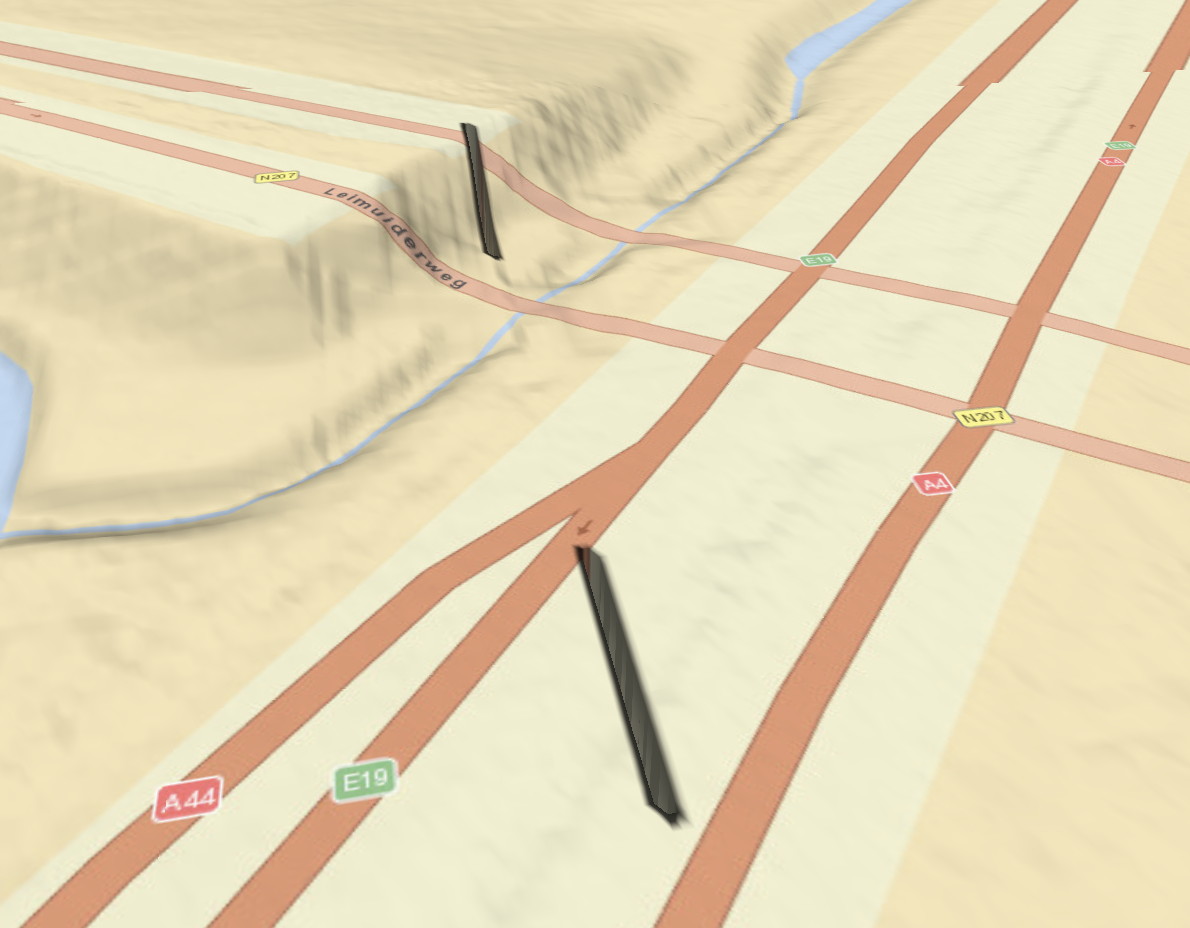
After warping the GeoTIFFs to a different coordinate system, we noticed some alignment issues. Specifically, there were narrow 1-pixel-wide gaps between the tiles. These tiny gaps can become quite noticeable and disrupt the seamless look we're aiming for.
This is wat it looks like showing nodata for the Tiff's within QGIS
And this is what these gaps look like when rendering the terrain
After experimenting with various solutions, including creating and using cutlines in combination with the -cblend option in gdalwarp, we still couldn’t resolve the issue.
Finally, I gave the files another round of gdal_fillnodata, this time setting the -md value to 1. This adds a single pixel around the data for nodata values. And voilà—suddenly, the terrain looked much better! Sometimes, a small tweak can make all the difference.
Hammer Time
With all the issues sorted, we’re ready to process all our DTM files into COGs and slap them onto some S3 storage, making them ready for use with CTOD!
Below is the script we use to process an entire folder of AHN4 DTM files and generate a .vrt file. It’s time to put everything together and let the magic happen!
Here’s a handy tip: If your CTOD service has caching enabled, make sure to run the CTOD seed cache script for key levels, such as from the set minimum level up to level 14 or so. This will help pre-generate and cache tiles at these levels, improving performance and reducing latency when users access the data. This will not create too many unused tiles.
Make sure to check out CTOD and give it a star!
Script
Convert entire folder of AHN DTM GeoTIFF files to COG and create a .vrt
#!/bin/bash

# Does not work on GDAL 3.4.1, update on ubuntu to 'latest' version (3.6.4)
# update and install needed packages
# ---------------------------
# sudo add-apt-repository ppa:ubuntugis/ppa
# sudo apt update
# sudo apt install parallel
# sudo apt install gdal-bin
# sudo apt install libgdal-dev
# sudo apt upgrade -y
# pip install GDAL==3.6.4
# pip install rio-cogeo

# Set PROJ_NETWORK to ON to download necessary files for gdalwarp these do not come
# with the default installation of GDAL
export PROJ_NETWORK="ON"

tmp_dir=tmp
s_srs="EPSG:7415"
md=8000
jobs=5

start_time=$(date +%s)
echo Start: $(date)

print_usage()
{
   # Display Help
   echo Syntax: '[-c|m|j|h]'
   echo options:
   echo c     Source s_srs - default $s_srs
   echo m     fillnodata maxdistance in pixels - default $md
   echo j     Number of jobs - default $jobs
   echo h     Print this help
   echo
}

process_tiff()
{
    tmp_dir=$1
    md=$2
    s_srs=$3
    tiff_file=$4

    f_out=$(basename ${tiff_file})
    filename="${f_out%.*}"

    # Fill nodata values
    /usr/bin/gdal_fillnodata.py -q -md ${md} -si 2 ${tiff_file} ${tmp_dir}/${filename}_filled.tif

    # Warp to EPSG:4326 with height as vertical datum
    gdalwarp -q -multi -r bilinear -s_srs $s_srs -t_srs EPSG:4326+4979 ${tmp_dir}/${filename}_filled.tif ${tmp_dir}/${filename}_filled_4326.tif

    # warp introduces jagged edges so we do another round of fillnodata with 1 pixels so we always have an overlap with
    # the neighbouring files
    rm ${tmp_dir}/${filename}_filled.tif
    /usr/bin/gdal_fillnodata.py -q -md 1 ${tmp_dir}/${filename}_filled_4326.tif ${tmp_dir}/${filename}_filled.tif

    # Change crs without warp so rio cogeo can handle the tif without complaining
    gdal_translate -a_srs EPSG:4326 ${tmp_dir}/${filename}_filled.tif ${tmp_dir}/${filename}.tif

    # Create COG
    rio cogeo create ${tmp_dir}/${filename}.tif ${tmp_dir}/${filename}_cog.tif --cog-profile deflate --blocksize 256 --overview-blocksize 256 -w --overview-level 10 --aligned-levels 2 --tms ./WGS1984Quad.json

    # Remove intermediate files
    rm ${tmp_dir}/${filename}.tif
    rm ${tmp_dir}/${filename}_filled.tif
    rm ${tmp_dir}/${filename}_filled_4326.tif
}

process_tiffs()
{
    echo Start processing ${tiffs} GeoTIFFS...
    find ./ -maxdepth 1 -type f -iname '*.tif' | parallel --bar -j ${jobs} process_tiff ${tmp_dir} ${md} ${s_srs}
}
export -f process_tiff

# Parse input arguments (flags)
while getopts c:m:j:h flag
do
    case $flag in
        c) s_srs=$OPTARG;;
        m) md=$OPTARG;;
        j) jobs=$OPTARG;;
        h) print_usage; exit 0;;
    esac
done

echo Temp directory: $tmp_dir
echo Fillnodata maxdistance: $md
echo Jobs: $jobs

# Check if input directory has .tif files
tiffs=`find ./ -maxdepth 1 -type f -iname '*.tif' 2> /dev/null | wc -l`

if ! [ $((tiffs)) -gt 0 ]
then
    echo Error input directory does not contain .TIF or .tif files.
    echo End of processing
    exit 1
fi

# Create tmp directory
if [ -d "$tmp_dir" ];
then
    echo A directory with the name ${tmp_dir} already exists. Please remove or rename it. Exiting...
    exit
fi

mkdir -p "$tmp_dir"
echo $tmp_dir directory created.

process_tiffs

# Generating the list of TIF files
find ${tmp_dir} -name '*.tif' > tif_4_vrt.txt
echo TIF file list generated: tif_4_vrt.txt

# Build VRT from index file
echo Building virtual raster ${tmp_dir}/ahn.vrt...
gdalbuildvrt -input_file_list tif_4_vrt.txt ${tmp_dir}/ahn.vrt -a_srs EPSG:4326
echo VRT created: ${tmp_dir}/ahn.vrt

end_time=$(date +%s)
echo End: $(date)
elapsed_time=$((end_time-start_time))
echo Elapsed time: $elapsed_time seconds.
echo End of processing